![3D CG Production: [ZEPETO: December Release Items] Virtual Butterfly MA-1](http://open-fashion.com/cdn/shop/articles/VirtualButterflyMA-1_231215_thumb_0b6a89db-cc90-4e47-9f58-e8c0cd71ecf2.jpg?v=1702580229&width=1100)
Introduction
Hello☺
I would like to briefly introduce the creation process of the items we have recently released.
Here are the items ↓ This time, we have a lot of color variations!
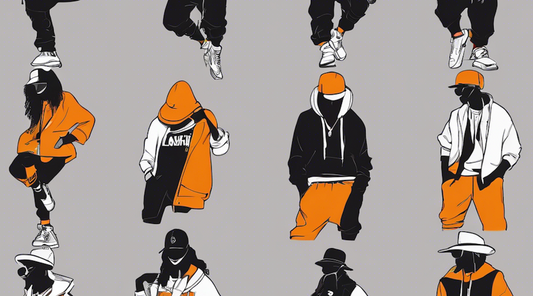
・Virtual Butterfly MA-1 Silver
・Virtual Butterfly MA-1 DenimN
・Virtual Butterfly MA-1 DenimLB
・Virtual Butterfly MA-1 DenimB
Item Theme and Design
Theme:
Butterfly: I
This piece was selected in a contest themed around the MA-1 jacket.
![]()
The design impressively features the glamorous and fantastical ambiance of butterflies.
The combination of the MA-1's functional image with the transience of butterflies created an interesting contrast.
Design
MA-1
I wanted to add a bit of the MA-1's characteristics to this piece, so I added an orange flap to the front zipper area and a pocket on the arm.
I considered using the basic MA-1 collar but decided against it as it might stray too far from the concept, so I went with a higher collar as shown in the product image and adjusted its openness.

However, making the collar open made the flap's shape somewhat awkward, so I had to be creative with its placement and length.

All rights to the displayed avatars are owned by CLO Virtual Fashion Incorporated. https://www.clo3d.com/
Inner
To highlight the butterflies, I went for a simple high-neck inner.
During modeling in CLO, I intentionally left some drapes to avoid monotony.

Butterflies
From the beginning, I planned to animate the butterflies, so I incorporated that idea.
Considering the use in Zepeto, I decided against background butterflies and focused on reproducing butterflies that seemed integrated with the clothing.

Here is the ZEPETO model we created this time.

Key Points of This Creation
Animation
Following the previous effects, this time I ventured into animation for the first time.
Although it was exploratory, I'd like to share some aspects of the production process.
Created three types of shape keys.
To avoid a mechanical impression with all butterflies moving in unison, I set them to vary slightly.
I divided the 11 butterfly motifs into three groups, changing their direction and values to create shape keys.
Below is the movement verification done in Blender.

Shape Key × Modifier
I honestly didn't expect to struggle so much with the interplay of shape keys and modifiers.
Here are some key points where ingenuity was needed:
①Mirror Modifier
The butterfly motifs were simple, symmetrically moving flat polys.

When applying this movement, I used the mirror modifier, which needed to be applied later. However, once shape keys are applied, modifiers can't be used.
I learned this along the way and found that many cases use add-ons for this.
I used an add-on as per this blog for assistance.
Using the add-on is very simple. Create shape keys with the mirror state and then just click the add-on once editing is complete.
②Armature
After resizing to the Zepeto model and switching from A-pose to T-pose, I had to apply the armature modifier, a somewhat cumbersome process.
The goal was simply to place the model with shape keys in the T-pose position.

To achieve this, duplicate the model and set them as follows:

Align the shape-key-retained model B to model A's position using the align tool, and you can place the model with shape keys in the T-pose position.
Adjustments in Unity
I reproduced the movements created in Blender in Unity, adjusting the strength of the movements with curves.
Each movement is varied slightly in wave height and start positions to ensure diversity.

Silhouette
One of the joys of Zepeto is coordinating outfits.
From feedback within the team on the last item released, I considered the skirt's state from the start to avoid clipping issues.
As a production method, I imported a dummy skirt object created in Blender into CLO for simulation, then fine-tuned the skin weights again.


All rights to the displayed avatars are owned by CLO Virtual Fashion Incorporated. https://www.clo3d.com/
Of course, it's challenging to accommodate all items, but I think we can expand the coverage by balancing and adjusting.

Color Variations & Material Expansion (Created using Photoshop AI)
For the first time, I created color variations for a single item.

Changing colors alters the impression, allowing more people to choose according to their existing items, which I hope increases the reach.
Adjusting textures alone makes it very easy to expand, so I'm glad I tried it this time.

Also, beyond just changing colors, I wondered how different materials would look. So, I tried fitting denim material, and it turned out great, leading me to create color variations in denim as well.
 By the way, I used Photoshop's AI feature to create the denim texture.
While it's not perfectly tiled, the texture generated didn't feel out of place when applied, so I used it as it is for this project.

Conclusion

I've introduced the production content of the newly released wear.
At our company, we create ZEPETO models from the designs selected in the accelerando.AI design contest, held about once a month.
I look forward to continuing to create a variety of items, inspired by everyone's ideas.
I hope you're looking forward to our next release as much as I am ☺
![[Easy on Your Smartphone] How to Create ZEPETO Items with Maison AI](http://open-fashion.com/cdn/shop/articles/387ac76082623e94218de7c076a87675.jpg?v=1712232721&width=533)