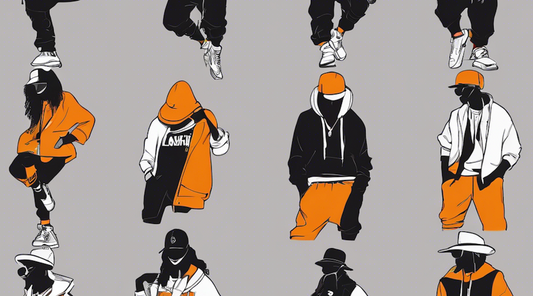
![[Creating 3DCG from AI-generated images] Modeling clothes designed by AI with CLO x Blender](http://open-fashion.com/cdn/shop/articles/accelerando_01_9030594e-45c7-470f-a792-22fc5a0d9761.jpg?v=1680652613&width=1100)
Introduction
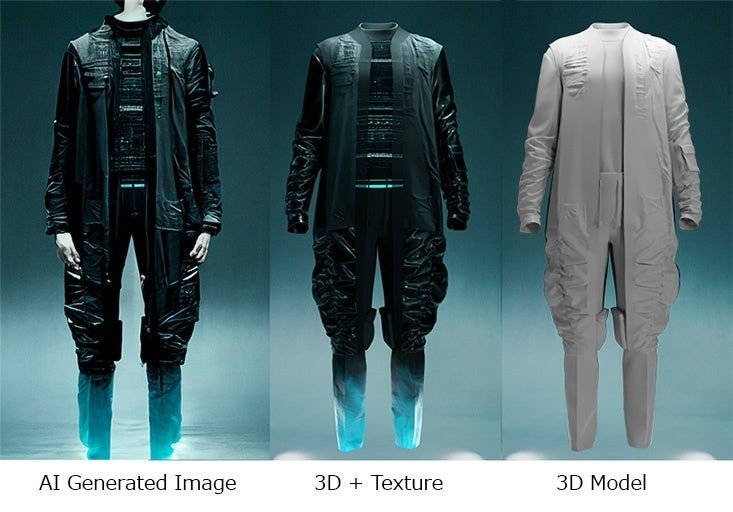
For the first time, we conducted R&D to determine whether it's possible to create 3DCG from AI-generated images and to identify the challenges involved.
Initially, we had no idea what techniques would be best for faithfully reproducing AI-generated images, but after many trials and errors, we managed to create something that we'd like to share with everyone.
I, Muto, who is writing this blog, primarily handled this R&D. I've been working as a pattern maker for several years, started using CG software about three years ago, and recently improved my understanding of Blender.
Production Workflow
Here, we introduce the software and workflow used in this production.

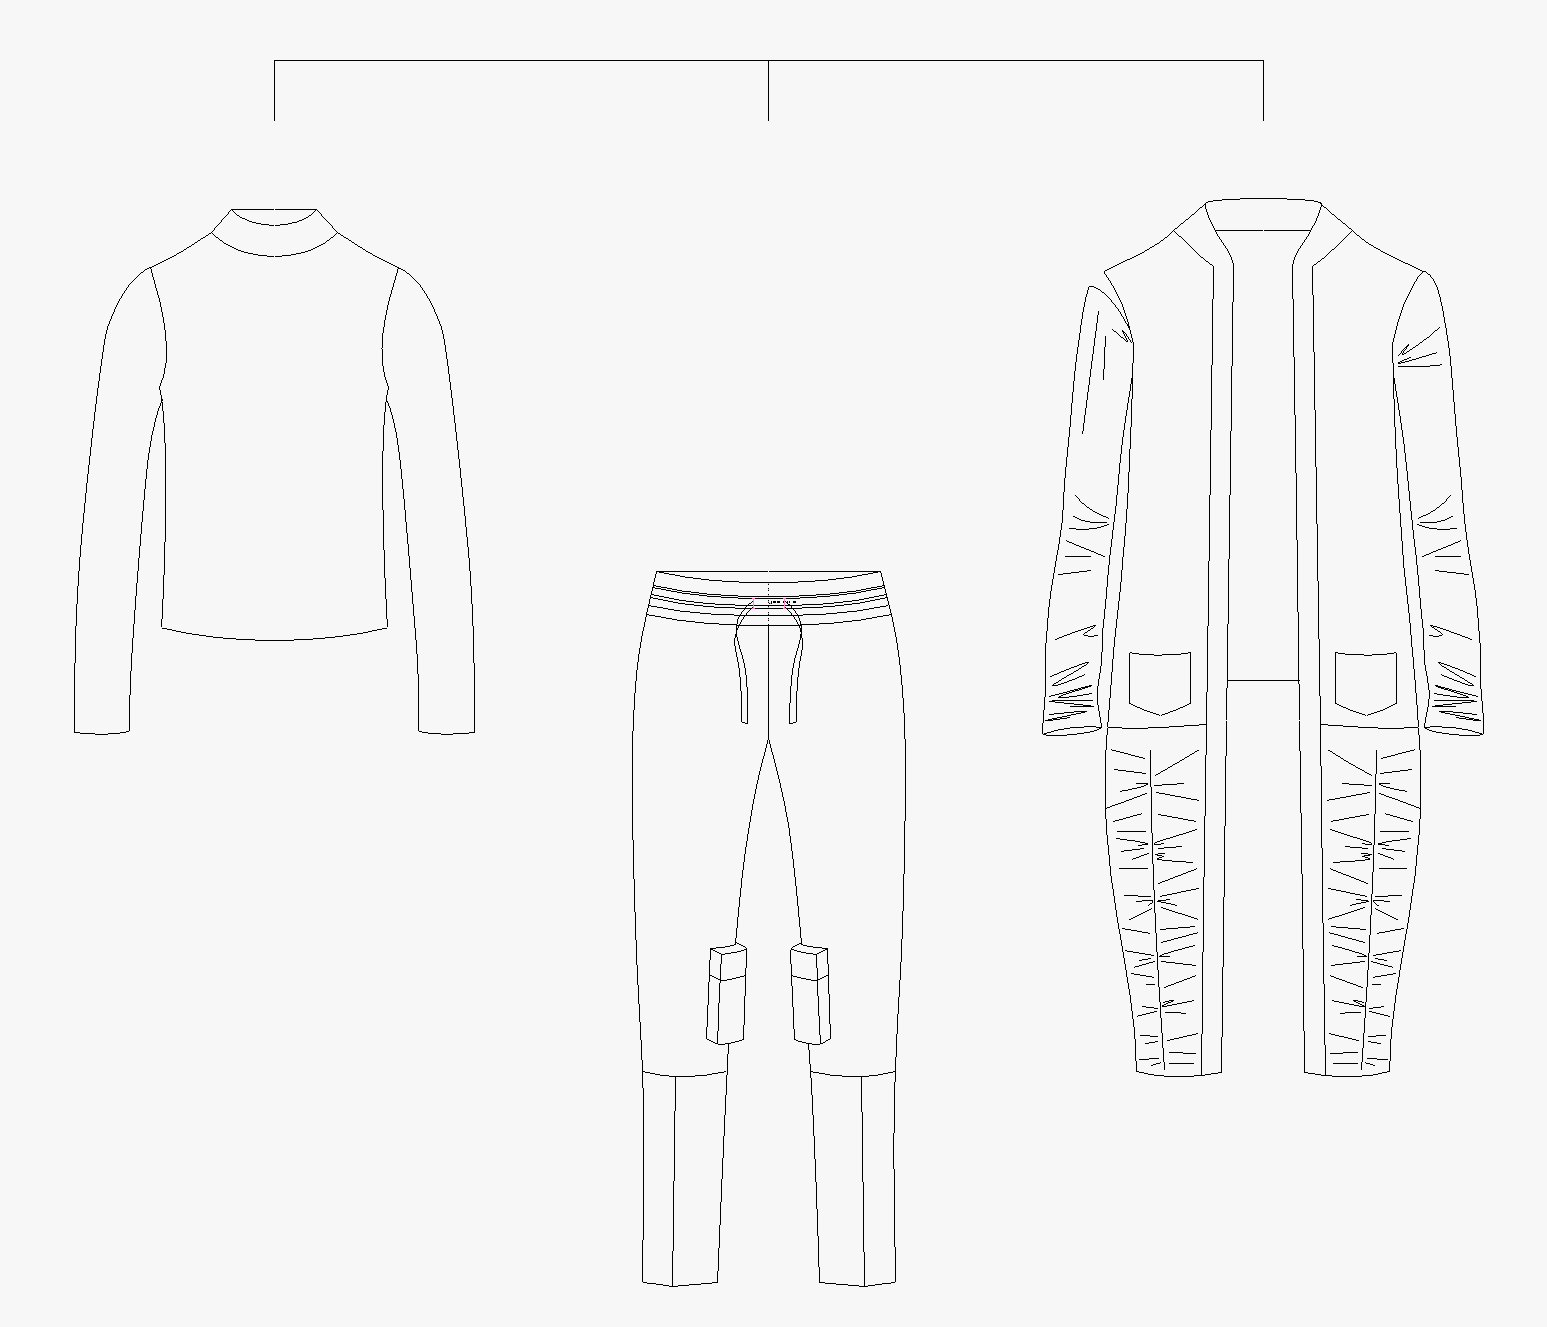
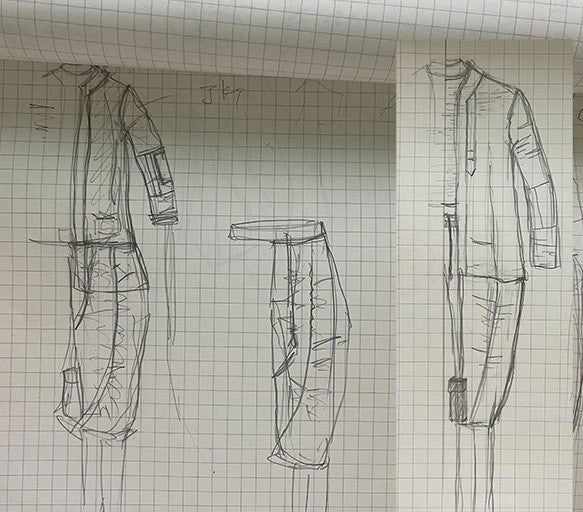
CAD: Pattern drafting, pattern making
Having a background in pattern making, I used CAD to create the patterns for this project. I also used CAD to draw the sketches.
Once there's no need for significant changes, we also adjust the patterns within CLO.
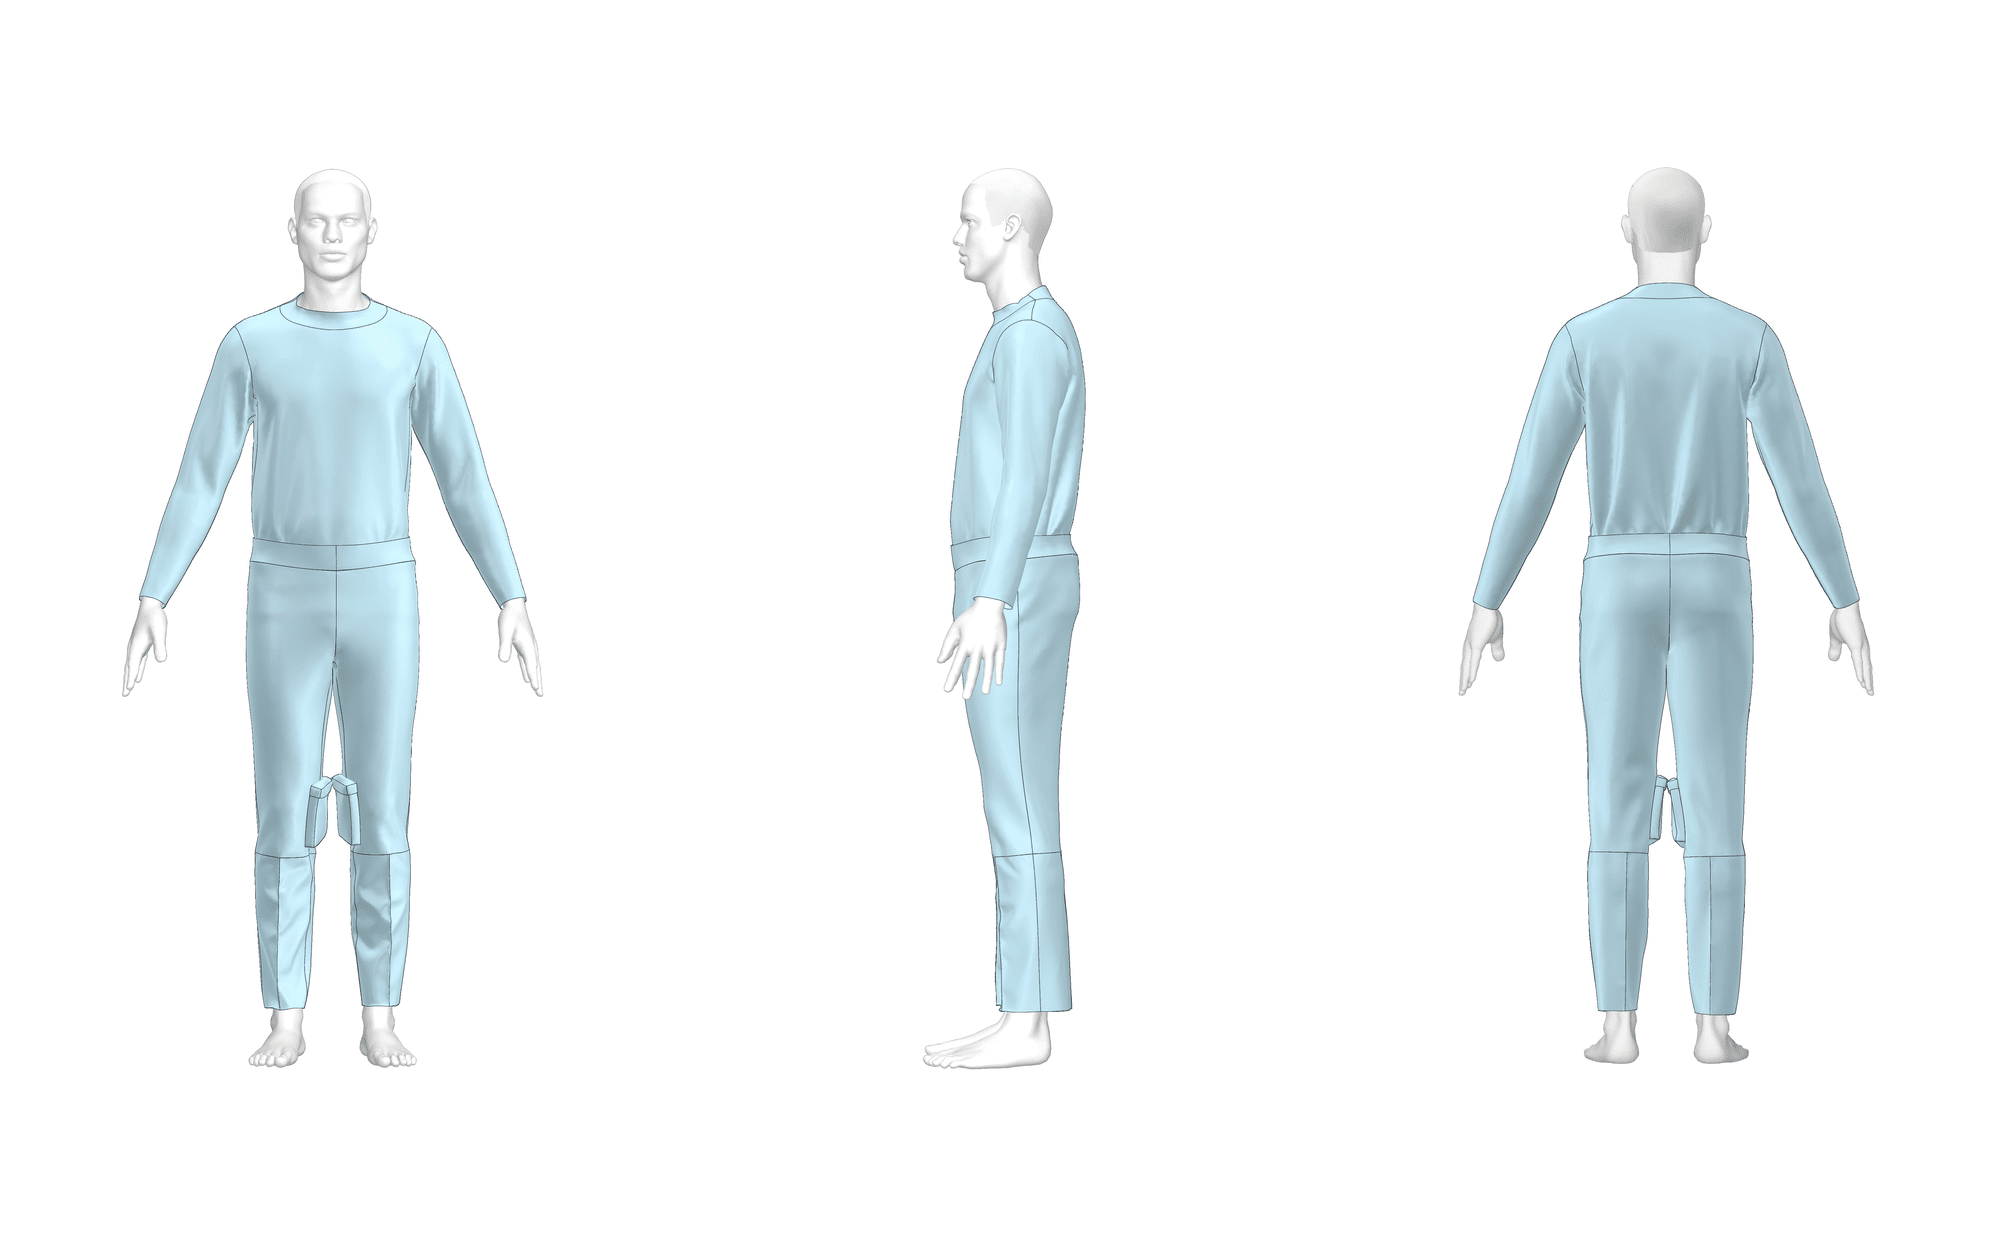
CLO: Avatar modification and clothing modeling based on patterns
Initially, we planned to import an avatar created with external software, but we ended up using the CLO model as-is and used a modified avatar with adjusted sizing.
We assemble the patterns created in CAD, make adjustments to the material properties and patterns while dressing the avatar.
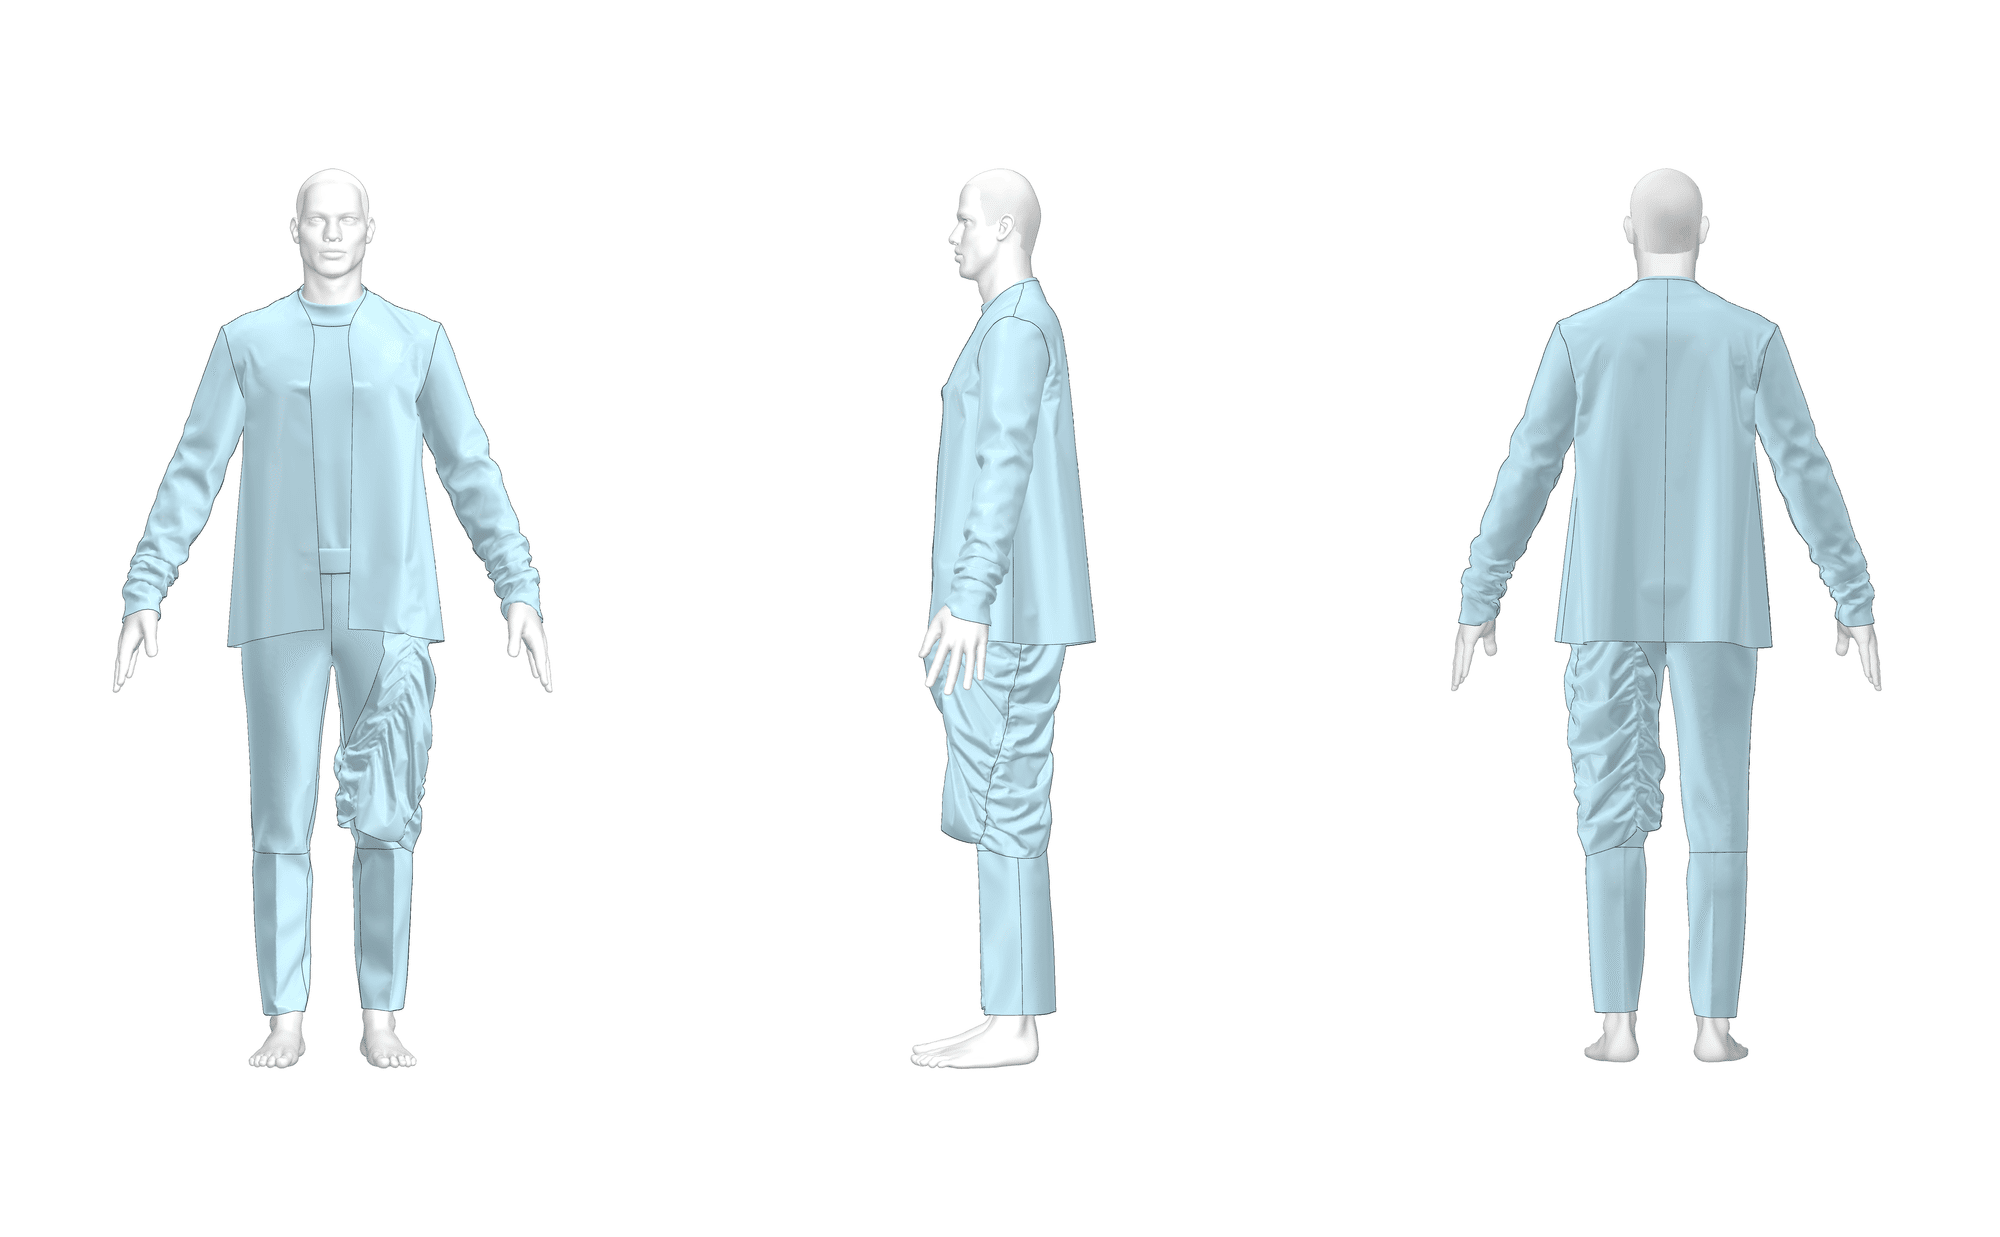
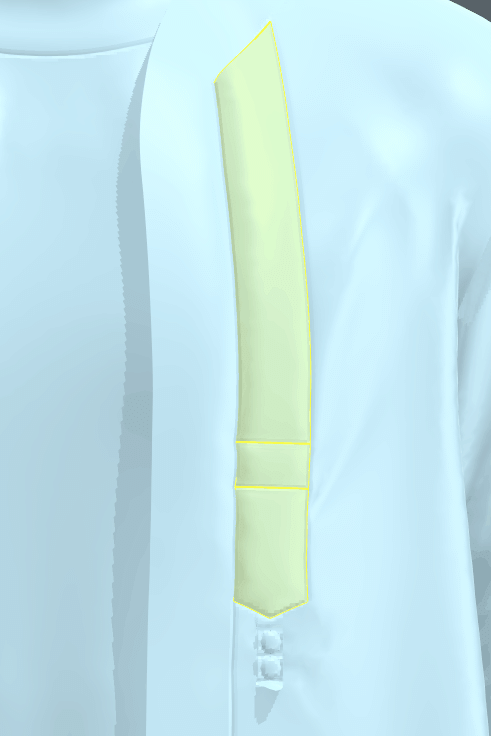
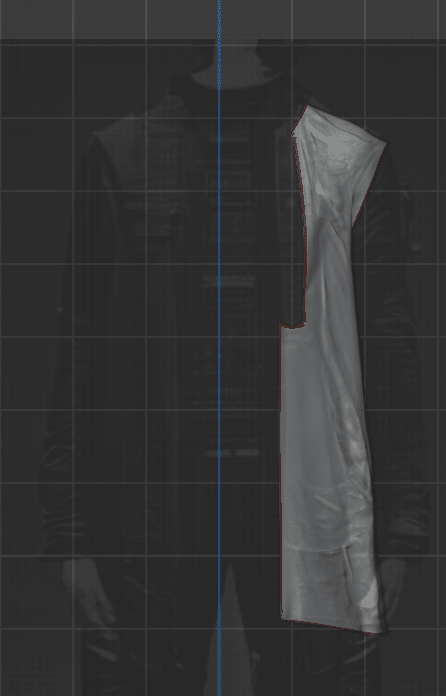
By the way, for the detail on the left front of the coat, we utilized the fabric influence from CLO's stitching.
By hiding the stitched parts, we think we achieved a representation close to the AI-generated image.
CLO→Blender
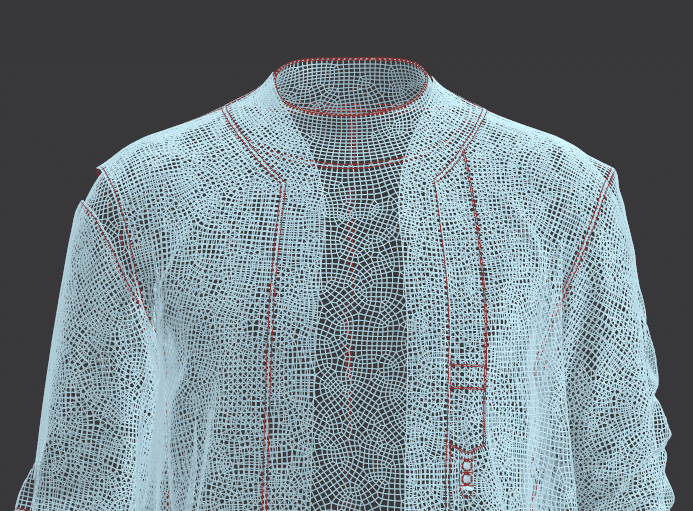
We export the data as OBJ.
In Omnis, when exporting from CLO, we set the mesh shape to quadrangles and add internal lines at the stitching points.
Making the mesh shape quadrangular makes it easier to work with when modifying the shape within Blender.
Also, adding internal lines helps suppress jagged edges that are prone to occur at stitching points, so we always do this before exporting.
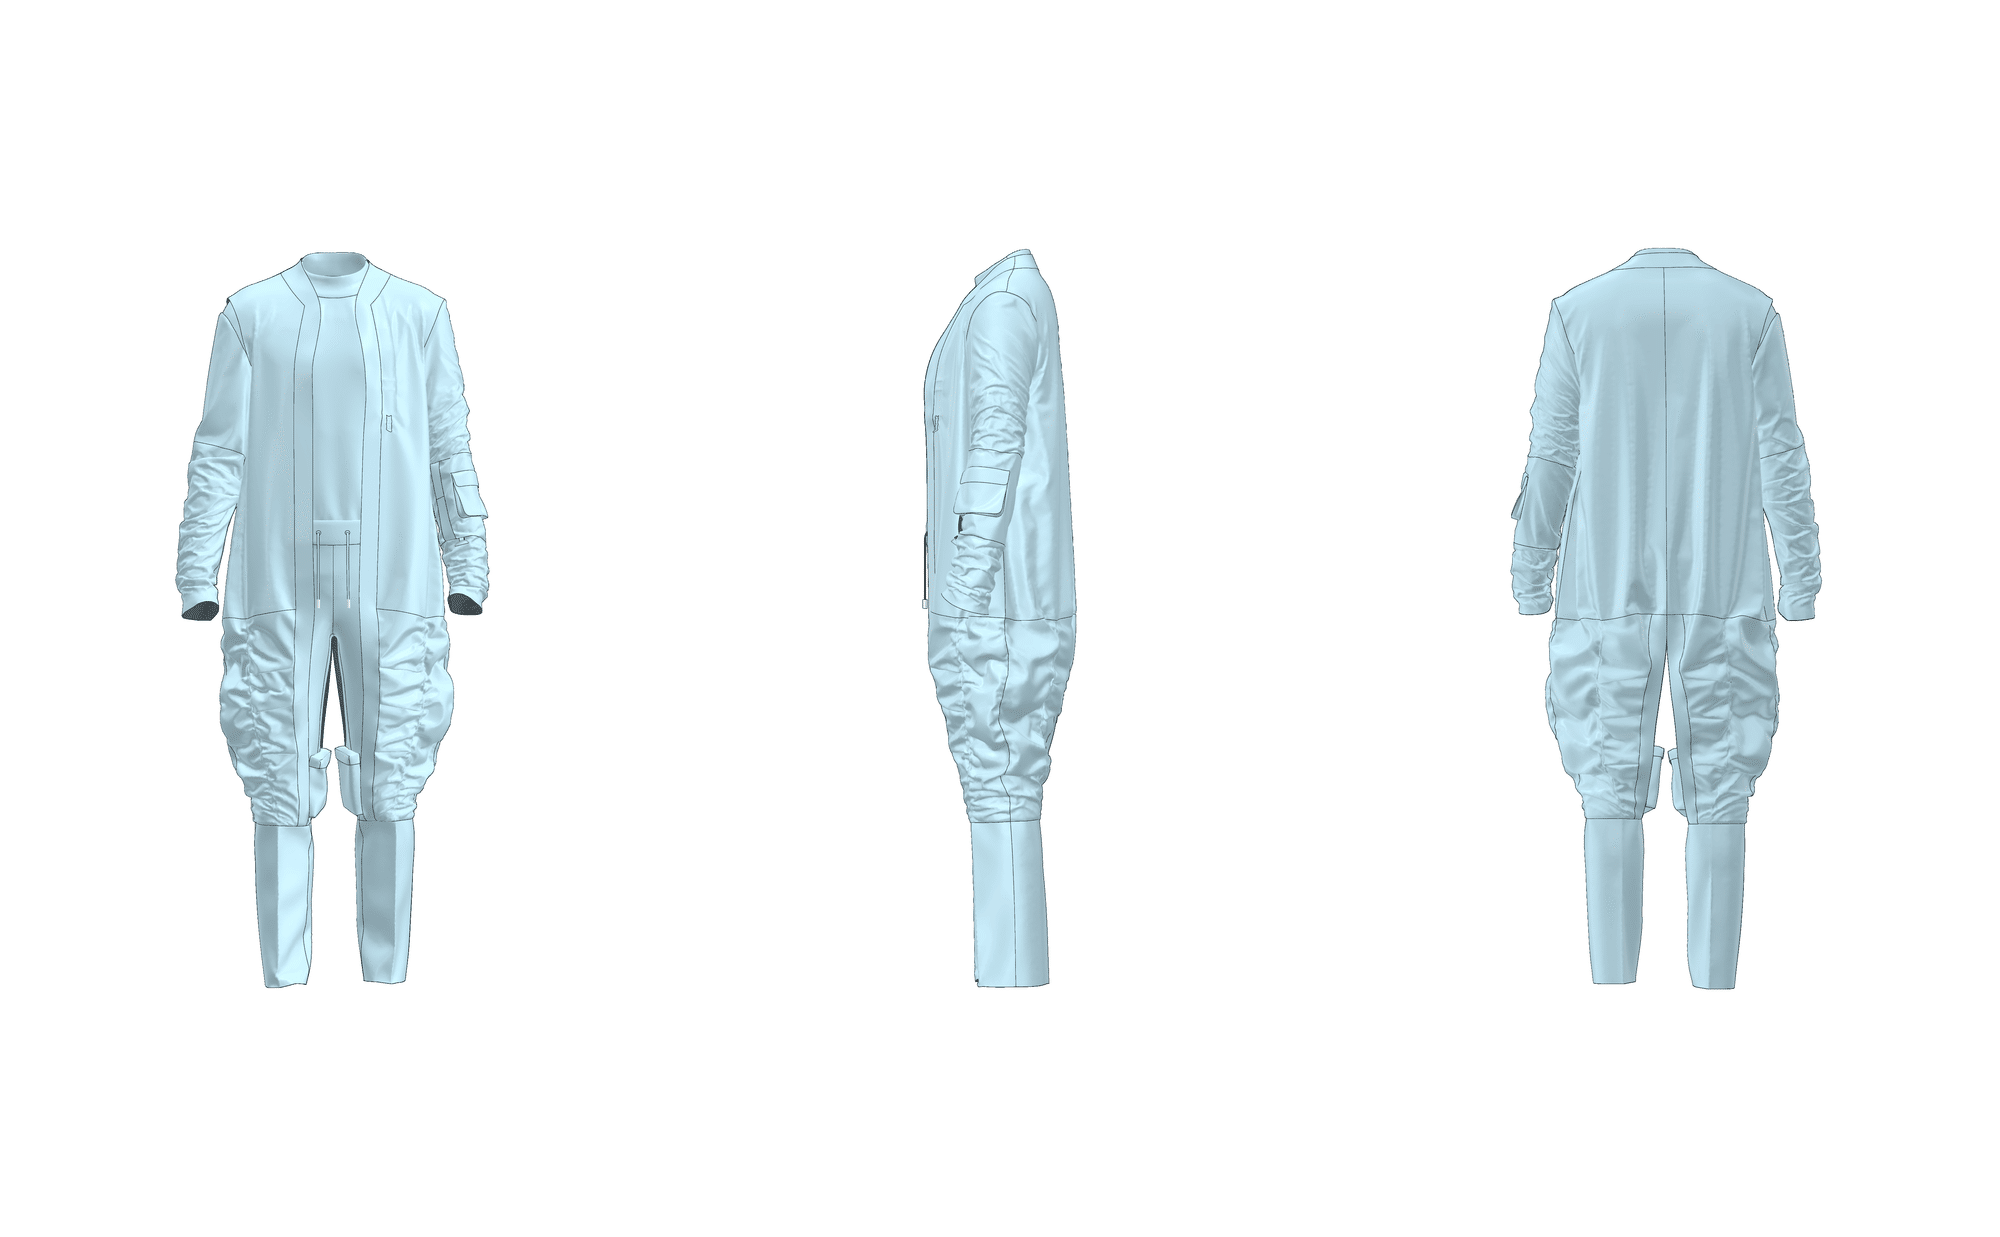
Blender: Scene creation, materials, lighting, rendering, and some modeling
We did all the work after clothing modeling within Blender.
For the background, we first created an image with the AI-generated model part erased in Photoshop, and then applied it to the background object.
We had already roughly decided on lighting with temporary materials applied and scene settings, but when we actually applied the materials, we couldn't easily reproduce the sharp reflections found in the AI-generated image. So, in the end, we adjusted the materials and lighting simultaneously.
We eventually placed 11 lights in total, adjusting reflections and contrast.

When setting up materials, for highlighting areas where light is reflected or for emphasizing edges, we used the Pointiness node in the [Geometry] node.

Furthermore, we used Blender's sculpting feature to reproduce the indentations on the coat's front.
Initially, we planned to use the Cloth Brush for a natural wrinkle finish, but it was difficult to control, so we ended up using the AI-generated image as a texture and sculpted it.
It was a struggle, but using this method brought us closer to the impression of the AI-generated image, which we think was a good outcome.
Photoshop: Some material creation, logs
We used Photoshop for all image editing.
Additionally, we used Photoshop to keep a log of rendering results and compare them.
Challenges
"How to understand AI-generated images"
This time, we started by considering how to create from already generated images.
AI-generated images have unique distortions and wrinkles, making it impossible to directly convert them into 3DCG. Instead, we needed to come up with a way to create more realistic 3DCG by referencing the atmosphere and design of the AI-generated images.
To do so, we first needed to deeply understand the AI-generated images themselves through research. Although it felt quite inefficient at times, looking back, this was the most important process.
Initially, when the design and structure we had in mind felt "off" or created a sense of discomfort, we had to go back to researching and reflecting those findings in the patterns repeatedly.
Although many aspects were only understood once we actually started working on them, we believe that we should have conducted thorough research when drawing the sketches.
Conclusion
We have introduced a method for creating 3DCG from AI-generated images.
Whether it is possible to reproduce the image, or whether it is better to draw inspiration from it and create something different, that was our starting point.
However, as we went through the process, we came up with ideas like "It might be better to do this" and the accumulation of those ideas led to the completion of the model.
We would like to keep an eye on the development of AI in the future and aim for more advanced 3DCG production!
Thank you for reading until the end.

![[Easy on Your Smartphone] How to Create ZEPETO Items with Maison AI](http://open-fashion.com/cdn/shop/articles/387ac76082623e94218de7c076a87675.jpg?v=1712232721&width=533)