![[ZEPETO: November Release Items] Music Neon Coat](http://open-fashion.com/cdn/shop/articles/November_Release_Item_Music_Neon_Coat_thumb_231115.jpg?v=1699986697&width=1100)
Introduction
Hello!
I would like to briefly introduce the creative process behind the item we recently released.
Item below↓
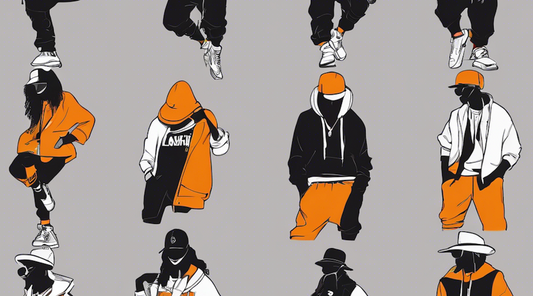
Coat: Music Neon Coat
Item Theme and Design
Theme
Intersection of digital and physical_Coat of Music
This piece was selected in a contest themed around long coats.

The most striking feature of this work, the red lines, create an illusion as if the sound waves are visualized, contributing to a fantastical atmosphere.
The theme "Coat of Music" suggests an embodiment of music.
Design
Coat and Hoodie
We kept the wear relatively simple.
Wanting to add a casual touch, and inspired by the raglan sleeves seen in our reference, we adopted raglan sleeves.

The hood is designed to stand up while appearing sleek, blending the style of a sweatshirt hood with that of a mountain parka.

The collar is naturally raised, adjusted using CLO's simulation, as shown in the image.

Red Lines
The distinctive red lines were dynamically expressed using effects, ensuring they don't overpower when worn in ZEPETO.
Initially, the design was relatively simple, but we added gradients to the cuffs and hem to harmonize with the effects.

Here is the ZEPETO model we created.

Key Points of This Creation
Effect
This was our first attempt at creating effects.
Effect creation involves combining various modules.
Broadly, there are main modules (green frame) affecting the overall effect and modules used in conjunction.
There are 23 types of modules, and understanding each took considerable time.

The uniqueness of this effect lies in the movement it creates along a designated path and its ability to follow the character's movement.
Firstly, the path-drawing effect was created using the Velocity over Lifetime module.
※The GIF below shows the effect without the Shape module for clarity.
Paths can be created in X, Y, and Z directions, and negative values are also possible.


Controlling the size, or rather the distance of the path, was challenging.
Distance equals the particle's lifespan multiplied by its speed, requiring constant consideration of both factors.
↓ Fixed Start Lifetime, increased Start Speed

↓ Fixed Start Speed, decreased Start Lifetime

For tailing the particles, we used the Trail module, which seemed the simplest.


Making the effect follow the character is surprisingly straightforward.
First, create a new bone in Blender and establish a parent-child relationship with ZEPETO's bones.
In this case, three new bones were created with the following parent-child relationships:
|
Parent Bone Name
|
|
|---|---|
|
Right Hand
|
lowerArmTwist_R
|
|
Left Hand
|
lowerArmTwist_L
|
|
Hem
|
chest_scale
|
Then, adding a particle system under the new bone in Unity creates the following effect.
However, be aware that some ZEPETO bones include scaling, affecting the effect's scale with body type changes.
In this case, the hem effect changes with body type, while the wrist effect remains consistent, using a bone that doesn’t vary with body type changes.


QuadRemesher
QuadRemesher is a paid add-on that automates retopology.
We mainly used MD's retopology function in previous creations, but recently we've been actively using QuadRemesher due to its manual nature.
Retopology with QuadRemesher is straightforward, but there are some key points to note.
Using QuadRemesher
QuadRemesher has a "Use Materials" feature, allowing for retopology based on assigned materials, enabling some control over mesh flow.

Materials should be separated at the points where parts meet.
↓Here is the finished piece.

Below is a failure example.
Initially, we didn’t separate materials for the tailor collar and sleeves, as they were not independent parts.
Without separated materials, the collar tends to wrinkle right where it turns.

Also, considering the sleeves' movement in ZEPETO, it’s preferable to have them encircle the elbow, thus separating materials there is more reliable.

When assigning materials, if the parts are already separated, it’s easy to set using UV or linked selection in Blender.
However, selecting parts like the coat's collar, as in this case, can be challenging.
Similarly, selecting the sleeve area below the elbow is quite a task (unless there's a specific design, this area rarely changes in parts, making selection difficult as shown on the right).

Here, the “internal line” becomes crucial.
CLO and MD have an “internal line” feature, which when added, acts as a boundary in Blender, aiding in selection.

Materials
Coloring the Edges
In addition to the gradients on the cuffs and hem, the coat edges are also colored.
This method doesn't use textures but Blender's nodes, offering high versatility. It’s easy to combine with other textures, making it highly recommended.
Here's the node setup↓

We first detect the edges using the Geometry node's Pointness feature.

Then, we adjust the edge range with a ColorRamp and further refine the affected area with an RGBCurve.

Finally, it’s just a matter of mixing in the color.
Conclusion

Though the content was quite extensive, I hope you found this introduction to the production of our newly released wear interesting.
Our team is continuously exploring new workflows and techniques.
We are currently working on models that pose new challenges, so look forward to our next release ☺
![[Easy on Your Smartphone] How to Create ZEPETO Items with Maison AI](http://open-fashion.com/cdn/shop/articles/387ac76082623e94218de7c076a87675.jpg?v=1712232721&width=533)